


How to Change the Strings on your Guitar (12 hole bridge)
An important step in learning to play the guitar is learning how to change strings. It can be very daunting for beginners because there are a lot of things you can do wrong. Here is a guide to teach you how to do it.
Before you change the strings, you need to get everything in order.
12 hole bridge and 6 hole bridge - whats the diefference
The difference between a 12-hole bridge and a 6-hole bridge is, as the name implies, that there are more holes for each string to pass through. The advantage is that you don't have to wind and knot the string as much to keep it from slipping. The extra holes for each string also make it easier to change strings.


What do you need?

There are a few accessories that are useful when changing strings. We use the OSWC-3H Ortega Winder and Cutter, it's a useful tool for turning the tuning pegs quickly and comfortably. It also allows you to cut the strings at the end. If you don't have one, you will have to tighten and loosen the strings by hand.
We recommend the OIWM Instrument Work Mat as a protective under the instrument.
You will need a suitable place to change your strings. Ideally a dining table where you have enough space. Lay the instrument on the Mat and place the piece of paper at the end of the bridge for the duration of the change.
Where to begin

Now we begin the actual process of changing the strings. We recommend changing the strings one at a time to avoid putting too much pressure on the neck. Ideally, start with the treble strings. And work your way down to the bass strings.
Removing the treble strings

Use the string winder to lower the pitch of the first E-string and remove all the tension from the string

Cut the string and remove it from the headstock and the bridge.

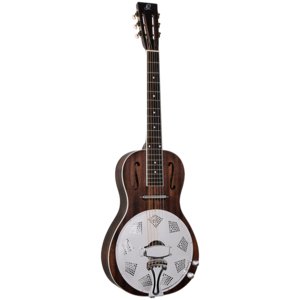
Resonator Guitars have a different Bridge and different Strings. They use Steel strings with a Ball at the end. Just remove them by guiding them out of the tailpiece. Do the same thing in reverse to install the string.
Installing the Treble strings

Now take the 1st E-string and insert one end into the lower hole of the bridge.

Pull the end of the string through and insert it into the top hole of the bridge. Tie a knot in the end and tuck it under the loop of the string.

Now pull the rest of the string to tighten the knot.
Installing the Bass Strings

Because the windings on the bass strings catch themselves more easily you don’t need to tie a knot in the string.

Guide the string through the holes, just like the treble strings and tuck it under itself, as shown in the picture above.
There are generally two types of tuning mechanics at the headstock. classical tuning mechanics and top-mounted tuning mechanics (typically used on electric guitars) Ortega offers guitars with both types of tuning machines. Here we will go through the process for both.


Classical tuning mechanics

On the headstock you will need to insert the other end of the string into the hole.

Pull the string until is tight and wrap it around itself 2-3 times, similar to the bridge.

Now tune the string to the desired pitch.
Top-mounted tuning Mechanics

For top-mounted tuners the process is slightly different.
Start by inserting the string into the hole.

Pull it tight, loop it around and wind around itself 2-3 times, so the Nylon string has enough tension.

Now tune the string to the desired pitch.

For our OTMLOCK6L locking tuning machine, the process is the same except that you can lock the string in place and thus don't need to wrap it around.
Repeat these steps for the all the strings.
Note: They will loosen naturally over the course of the string change and the following hours. You will need to continue tuning the strings a few times. You can find a tutorial here.

The only thing left to do is to cut off the excess strings at the headstock and bridge to make your guitar look nice and neat again.
Some people burn the end to make a little nob that stops the string from coming loose.


